Sunday, March 16, 2014

Spiced apple chickpea cake


Recently I have been experimenting with cake recipes that are naturally gluten free or are made with alternative flours or no flour at all. I have previously dabbled with cakes made with chickpeas and beans previously including one that ended up being featured in The Clandestine Cake club cook book and they turned out well. The gluten free chocolate cake is of particular note , the link is here.


This recipe is based on the same basic recipe but I fancied including grated apples and spices to provide a fruity flavour in place of the chocolate plus I have bought a lot of apples recently as I am also planning on having a go at using apple sauce / puree as a butter alternative in baking so watch out for that post too.


Chickpeas or garbanzo beans (as our friends across the pond call them) are used as the flour substitute yet you still get some rise, the recipe is also lower fat as it has no added oils or butters. The cake is lovely and moist and is great served on its own or as a dessert if served with cream, custard or yogurt. You would never know it contains chickpeas at all, plus it smells amazing whilst baking all cosy and comforting.


What you need
  • 1 can of chickpeas, drained and rinsed
  • 3 eggs beaten
  • 1 cup of caster sugar
  • 1 tsp baking powder
  • 2 tsp lebucken spice (I used Steenbergs but you can come up with your own spice mix, may be incorporating cinnamon, cloves, ginger or what ever else takes your fancy)
  • A couple of cox apples - grated keep the skin on 
  • Lemon rind
What you do
  • Grease a square cake tin roughly 9" by 9"
  • Pre heat your oven to 180C
  • Pulse the chickpeas in a food processor until they become a fine paste , now pulse in the rest of the ingredients.
  • Pour the mix into your prepared tin, don't be alarmed the mixture will be very runny
  • Bake for at least 45 minutes until golden, set and risen. Test with a skewer to make sure its cooked through
  • Cool fully on a wire rack
  • Cut into squares and store in an airtight tin for a couple of days if it lasts that long


Saturday, March 15, 2014

Chicken chow mien

As you have probably gathered by now, I am not a fan of takeaways and ready made sauces preferring to make my own. Not only do they taste much better, they are less expensive and you are in control of the ingredients. As a child I enjoyed the occasional takeaway and one of my Dad's favoured dishes was a chicken chow mien along side a char sui pork.


In adulthood I started making chicken chow mien as a quick and easy supper dish that could be quickly whipped up on return from work, the vegetable ingredients are infinitely variable depending on whats in season (or more likely whats in the fridge!), as long as you have some source of protein and some noodles you have the basis of a chow mien.

Its also recipe that is easily converted to gluten free buy substituting rice noodles and tamari for the egg noodles and soya sauce. Its extra tasty served with prawn crackers or kurups if you are wanting more of a Chinese banquet. This recipe can be on the table well within 30 minutes so is very family friendly too and is a fun dish as it features noodles which are normally popular with youngsters.

The recipe also uses five spice, typically a blend of star anise, cloves, cinnamon,sichuan pepper and fennel, but some have ginger, turmeric or nutmeg in the blend. I adore the fragrance of five spice I think its the star anise that makes it so special , but may be its the blend of yin and yang or the balance of sweet, salty, bitter, sour and pungent all in one mix.


What you need
  • Chicken ( or prawn or tofu or quorn), cut into bite sized pieces
  • Cornflour - about 1 tbsp
  • Five spice - about 1 tbsp
  • Wok oil / Sesame seed oil
  • Vegetables to stir fry (I used welsh onion, red pepper, mange tout peas, courgettes, mushrooms) - chopped ready
  • Soya Sauce (or Tamari if you need gluten free)
  • Noodles ( use rice noodles if you want gluten free)
What you do
  • Firstly have all your ingredients to hand
  • Tosh the chopped chicken in the cornflour and half the Chinese five spice
  • Put the noodles on to boil as per the instructions on the pack (normally between 3-7 minutes)
  • Heat your wok or large frying pan containing the wok oil until very hot, add the marinated chicken and fry quickly until starting to colour golden
  • Add the vegetables, the rest of the five spice and stir fry until everything is cooked
  • Season with soya sauce
  • Switch of the heat and add the drained noodles to pan, mix thoroughly
  • Serve immediately on warmed plates sprinkling with more soya sauce if you like.
My lovely cakey foodie friend Clare over at Good Egg Foodie has just launched a new blogger campaign "Spice Up your life" for cooking with spices. As our recipe is using Chinese five spice it should definitely spice up your life.

                                               SPICE UP YOUR LIFE RECIPE LINK UP

I am also linking up to Fab Fast Food March family foodies challenge , for recipes that are family friendly and on the table in under 30 minutes over on Bangers and Mash and Eat Your Veg


Sunday, March 9, 2014

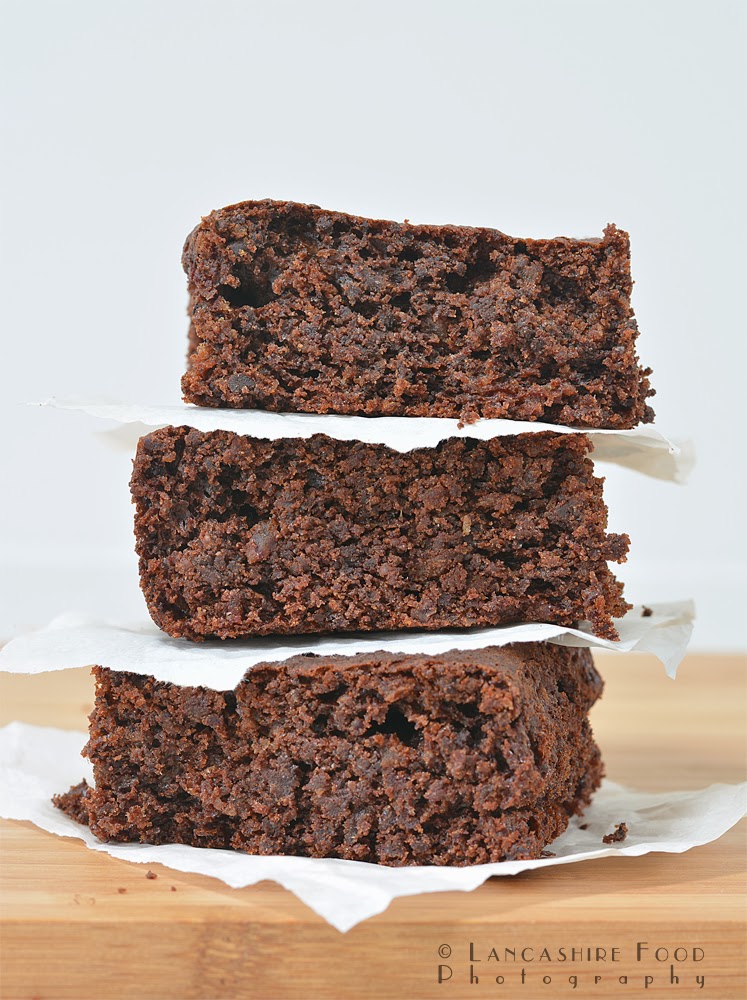
Date sweetened gluten free brownies

These are amazing, trust me they are, purely fruit sweetened, naturally gluten free and very easy to make ( well as long as you have a decent food processor). I first spotted this recipe when it was shared by Jamie Oliver on Facebook, intrigued I popped over to the website only to find that the recipe originated from Elana Amsterdam  of Elana's pantry, one of my favourite American bloggers.


In the last couple of weeks since discovering this recipe I must have made them at least half a dozen times, whipped up in about 45 minutes start to finish they are great and make a fabulous addition to any lunch box. I have now taken to bulk buying dates so I always have the ingredients in so I can whip up a batch if the mood so takes me, the recipe is rich in fibre, antioxidants and low in fat too.

I also a little bit addicted to using coconut oil in baking and this recipe being paleo in origin uses this ingredient too, you can't taste it but it seems to make your bakes more bouncy, its pricy but well worth the investment. Also please ensure you use a good quality dark chocolate so that you get the best antioxidant boost possible from your bake.


What you need
  • 200g Dark chocolate (a good % of cocoa solids), broken up into squares
  • 1/2 tsp bicarbonate of soda
  • 200g dates (whole stoned or chopped)
  • 3 eggs
  • 1/4 cup coconut oil - melted
  • 1 tbsp vanilla extract
A square cake tin, lined approximately 8" by 8"

What you do 
  • Pre heat the oven to 180c
  • Blitz the chocolate and bicarbonate of soda in your food processor until its the texture of coarse sand
  • Next add the dates and continue to blitz until you are back to the coarse sand texture
  • Add the eggs, coconut oil and vanilla to the procesor and pulse until incorporated
  • Tip into your preprepared tin and smooth level in the tin
  • Bake for 30 -35 minutes until risen and cooked through
  • Cool initially in the tin and then on a wire rack
  • Store in an airtight tin


I am entering this post in JibberJabberUK Love Cake campaign as this month's theme is "Giving Up" so as this brownie has no flour, no artifical sugar and is low fat its an appropraite entry.

                                               Love Cake logo

And also We Should Cocoa created by Choclette and hosted this month by I'd much rather bake than..., the  theme this month being Coconut, well this recipe includes chocolate and coconut oil so I hope it qualifies.


Lekue - lets make bread, gluten free bread !


Gluten fee bread that looks and tastes (well similar) to real bread is the holy grail, yesterday on baking a Dan Lepard recipe I came close, very close to nirvana. This recipe has the praise of various bloggers across the world and is also featured on the BBC Food website,  so given that I had a lekue bread maker to give a whirl I thought I would give it a try and wow, I wasn't disappointed. The resultant bread had a crunchy crust and a texture heading toward a real crumb structure, it even rose a little and had a tiny bit of oven spring.

The recipe features two ingredients that make all the difference to gluten free bread baking, pysllium husk and golden linseed (aka flaxseed) both of which have gummy properties (there is no other way of putting it) which help give the bread stretch and which help make the crumb softer. The linseeds also help give the bread a "wheaty" like flavour.

I think the bread would be ideal toasted along side pate or toasted and topped with cheese and beans, its more like an artisan crusty cob loaf than sandwich bread.


What you need

  • 30g golden linseeds
  • 475ml warm water
  • 2 1/2 tsp fast action yeast
  • 100ml natural yogurt - I used greek yogurt
  • 450g cornflour
  • 1 tsp salt
  • 1 tsp caster sugar
  • 50g psyllium husk powder
  • 50ml olive oil
  • Extra olive oil and cornflour to finish
What you do 
  • In a bowl mix the yeast and water, so the yeast starts to become active, stir in the yogurt and the baked linseeds. Mix this all together.
  • In the lekue baking bowl I had weigh out the cornflour, psyllium husk, salt and sugar.
  • Add the yeast mix and olive oil into the dry ingredients and mix well, do this quickly as it rapidly starts to seize.

  • Once the mix is firm enough knead it for about 10 seconds ( I did this in the bowl), cover and leave for about 30 minutes, I did this by folding up the bowl.
  • After the 3 minutes has passed shape the dough ready for baking, either on a tray lined with baking paper or in my case in the bowl,. Brush the top of the dough with a little extra oil and cover and leave to rise for 30 minutes (and amazingly it did a little) covered or in the lekue bowl.

  • Pre heat your oven to 220c fan / 240c normal , uncover the dough and slash the top and sprinkle with a little cornflour. Bake for approx 40 minutes or so until a good colour is achieved.

  • Leave to cool on a wire rack until fully cold before cutting

The dough is versatile enough to be suggested for buns or a foccacia sheet also.

The recipe is adapted slightly from Dan Lepard's recipe on BBC Food and I used the Lekue Bread maker which had been provided to me by Lekue for review purposes.


Thursday, March 6, 2014

Rosemary, lemon and garlic roast chicken thighs with baby roasties

I love dishes like this where everything cooks in the same pan concentrating the flavours and minimising the washing up. Chicken thighs are an economic cut of meat to get hold of and in my humble opinion also a cut of chicken which has the most flavour, ideally try to purchase free range if you can the taste will be better and the chickens will thank you.


I plundered the herb garden for an ample handful of rosemary which is one of my favourite herbs, so reliable, versatile and it smells amazing too. Rosemary is also this months theme for Cooking with Herbs, one of my favourite blogger challenges hosted over on Lavender and Lovage by Karen if you fancy joining in. The lemony inspiration came from the fruit bowl and preserved lemons. So lets pull together a great easy supper dish which satisfies that mid week crazing for a roast.

What you need
  • Large roasting dish (works best if you use metal)
  • Chicken thighs (skin on, bones in)
  • Lemon - sliced (about thickness of a pound coin)
  • Whole head of garlic - sliced across the middle
  • Large bunch of rosemary
  • Baby potatoes - skin on, slice in half if large
  • Olive oil
  • Sea Salt and Pepper
What you do
  • Pre heat the oven to 200c
  • Place all ingredients in roasting pan, nestling the garlic and lemon around the chicken and potatoes
  • Break the bunch of rosemary into small sprigs and sprinkle on to the dish
  • Drizzle with olive oil and sea salt and freshly ground pepper, toss slightly.
  • Place in the oven for 45 minutes until golden and the chicken is cooked through
  • Serve with rocket salad dressed with balsamic vinegar or blackberry vinegar.


                                           Cooking with Herbs

Sunday, March 2, 2014

Lekue - Gluten free waffles

One of the benefits of blogging is that from time to time we receive products from companies for review. Lekue is a Spanish kitchenware company which specialises in high quality silicone kitchen products and they have kindly sent me a parcel of their products to have a play with in my kitchen.

One of the items they have supplied is a waffle making mold, now as someone who has never made her own waffles before I was a bit nervous of making them especially as I was to try a gluten free version. The waffles you can buy in the shops seem to full of lots of additives so even before switching my diet they weren't something I would every buy. I do however have a thing for maple syrup (the real McCoy ! ) and waffle and maple syrup are natural partners right, so waffle making I go.

As you may know gluten free flours behave slightly different to normal flours so I was a bit nervous how they would turn out. Never fear they were fine, may a little on the dry side but that is soon solved with berries or syrup on top, so next time I'll also make sure I knock a few minutes off the overall cooking time.


What you need 

  • 2 cups of GF plain flour (I used Dove's Farm)
  • 2 tbsp granulated sugar
  • 2 tsp baking powder
  • 1/2 tsp bicarbonate of soda
  • 1/2 tsp salt
  • 1 egg - free range
  • 3/4 cup milk (I used skimmed, sure you could use soya, almond or other if you have diary allergy)
  • 1 tbsp vegetable oil or melted butter
This makes enough for 4 waffles


What you do

  • Oil spray the waffle mold if needed ( apparently once used a couple of times you don't need to)
  • Mix all the ingredients in a bowl and whisk up into a thick smooth batter.
  • Once mixed leave to one side for 5 minutes, meanwhile preheat the oven to 220C
  • Now that the oven is warm, pour into the mold which is on a baking tray, just filling until it covers the top of the nobbles
  • Bake for 8 minutes until golden and risen
  • Remove and cool for a few moments before un molding the waffles, place them on the baking tray and return to the oven for 3 - 5 minutes 
  • Serve warm with syrup, honey, fruit, ice cream whoever you fancy.


We now fancy trying a polenta savoury waffle so I'll let you know how we get on. We also have several more Lekue products to try so keep an eye out for those too. I was impressed with the quality of the product and would recommend if you like waffles and would like to make you own from scratch, they were sturdy and easy to clean. The pack contained two waffle trays and also a handy recipe book.

All opinions expressed are my own and the post is my own work. I have not received payment for this post but have been sent the item being reviewed free of charge by Lekue.

March - A Quick Bite Of Lancashire Food


Sarah Longlands and Lisa Kidd from I Heart Jam


This month featured foodies (your getting 2 for the price of 1 this month !) are the lovely ladies behind I heart Jam, a Bolton based company which produces seasonal artisan jams and preserves. Regulars on the farmers market circuit this ladies are passionate about using the finest local seasonal produce to create some mouth watering flavour creations. They love to ring the changes and will often have a new creation for you to try.


  • What is your favourite cookery or food book or publication ?
We like a whole range of cookery books particularly those which have interesting ideas about jam. Marguerite Patten has some great advice for jam makers and her recipes for traditional jams and marmalades have been important influences for us as well as the recipes which we’ve received from friends and family over the years. More recently we’ve enjoyed ‘Salt Sugar Smoke’ by Diana Henry which contains some gorgeous recipes ideas for jam and marmalade.

  • What sentence sums up Lancashire Food to you ?


  •  If you weren't doing what you do now, what would you like to be ?
Sarah would like to be finishing her PhD on urban planning and economic growth! As well as jam making, Sarah’s other passion is social research and she is currently undertaking a full time PhD at Glasgow University. 

Lisa says she is happy where she is right now, enjoying the jam making & about to finish work for a year’s maternity leave with a first baby on the way in early April.

  • Which piece of kit could you not do without ?
Our kettle, it’s an essential tool which helps fuel us with tea on our jam marathon days!

  • Who would join you at your ultimate dinner party and why?
We’d invite Hugh Fearnley Whittingstall, Leonard Cohen , Eddie Izzard, Aung San Suu Kyi as well as our families. We’d serve afternoon tea with a selection of our favourite jams including hedgerow jelly, strawberry and gooseberry and Lakeland damson. 

  • What advice would you give to your younger self ?
Sarah - don’t take life so seriously! Enjoy it. Travel more. 
Lisa – start up a small business early in life! So much fun & very rewarding.

  • Describe your style in three words
Home-made, seasonal and jammed (full of flavour)!

  • What was your latest foodie gadget purchase ?
A strawberry corer! We thought that might be wise since Lisa got a major neck injury de-coring 10kgs of strawberries that we bought for jam making last summer! A week off work and 5 physio sessions sorted it out eventually!!

  • What is your greatest achievement to date ?
Taking the plunge and setting up I heart jam from scratch and in the process creating a whole range of seasonal jams.

  • What is the worst mistake you have made ?
Getting pounds and kilograms mixed up whilst measuring sugar! Buying too many strawberries!

  • Tell us a secret about yourself ? may be something we wouldn’t expect !
Sarah was once a member of the National Youth Theatre and briefly contemplated a life on the stage. 


The majority of Lisa’s days are spent in casinos and pubs..... because she works as a environmental health consultant auditing in the hospitality industry).